
Salon Ready Aura Nails: 3 DIY Methods That Actually Work
- Bradenton Salon Today
- 3 days ago
- 8 min read
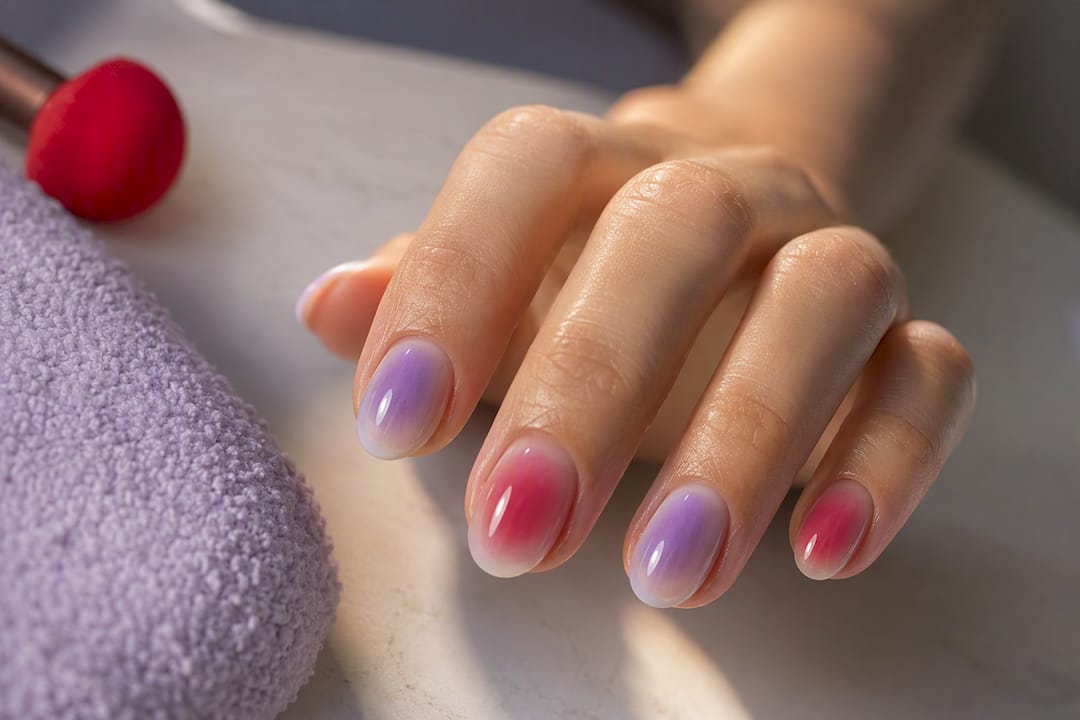
Aura nails are a gradient nail design with a diffused, halo-like center that fades outward into soft color, distinct from the diagonal sweep of an ombré manicure. You can create a decent version at home with a makeup sponge or pressed eyeshadow. For a crisp, salon-grade blend with multiple colors or a crystalline finish, book a technician with an airbrush. Gel application holds the look far longer than regular polish.
TL;DR:
Achieving a crisp aura nail look requires patience, with gel and airbrush methods delivering longer-lasting, more professional results than sponge or pigment techniques.
Using opaque, saturated polish layers and allowing each to dry fully helps prevent muddy colors and uneven halos in the final design.
Aura nails can last between five to seven days with regular polish and up to three weeks with gel, provided proper top coat application and care habits are followed.
The style is best suited for short, round, or coffin-shaped nails for contrast, with multi-color and crystalline effects requiring professional airbrush work for precision.
DIY aura nails are a fun weekend project, but complex multi-color sets or crystalline finishes benefit significantly from booking a professional with experience in airbrushing.
Table of Contents
What Are Aura Nails, and How Do They Differ From Ombré?
Picture a soft cloud of color glowing from the center of the nail outward, fading into bare or lightly tinted edges. That’s the core aura look: a rounded halo, not a straight line of color. Traditional ombré runs one shade in a directional gradient, usually dark at the cuticle fading to light at the tip. Aura nails skip the direction entirely and bloom from a focal point, which is why the style reads as a glow rather than a fade.
The finish matters as much as the shape. A matte aura reads soft and lived-in. A shimmer or opal topcoat adds dimension and catches light in a way flat polish can’t. Chrome overlays push the look toward something almost holographic.
By 2026, the trend has expanded well past a single soft color. Multi-color “Northern Lights” sets layer two or three hues into one halo, often finished with a crystalline or refracting topcoat that mimics the shimmer of an aurora. Popular variations include:
Classic single-tone aura: one color radiating from a centered point
Northern Lights aura: multiple colors blended into one halo with an opal or refracting topcoat
Skittle aura: a different aura color on each nail
Outlined aura: a thin contrasting line traced around the glow for definition
How to Do Aura Nails at Home: 3 Methods That Actually Work
The right method depends on what you’re working with: polish and a sponge, gel and pigment, or a trip to the salon for an airbrush. All three can produce a good aura manicure. They just involve different learning curves.
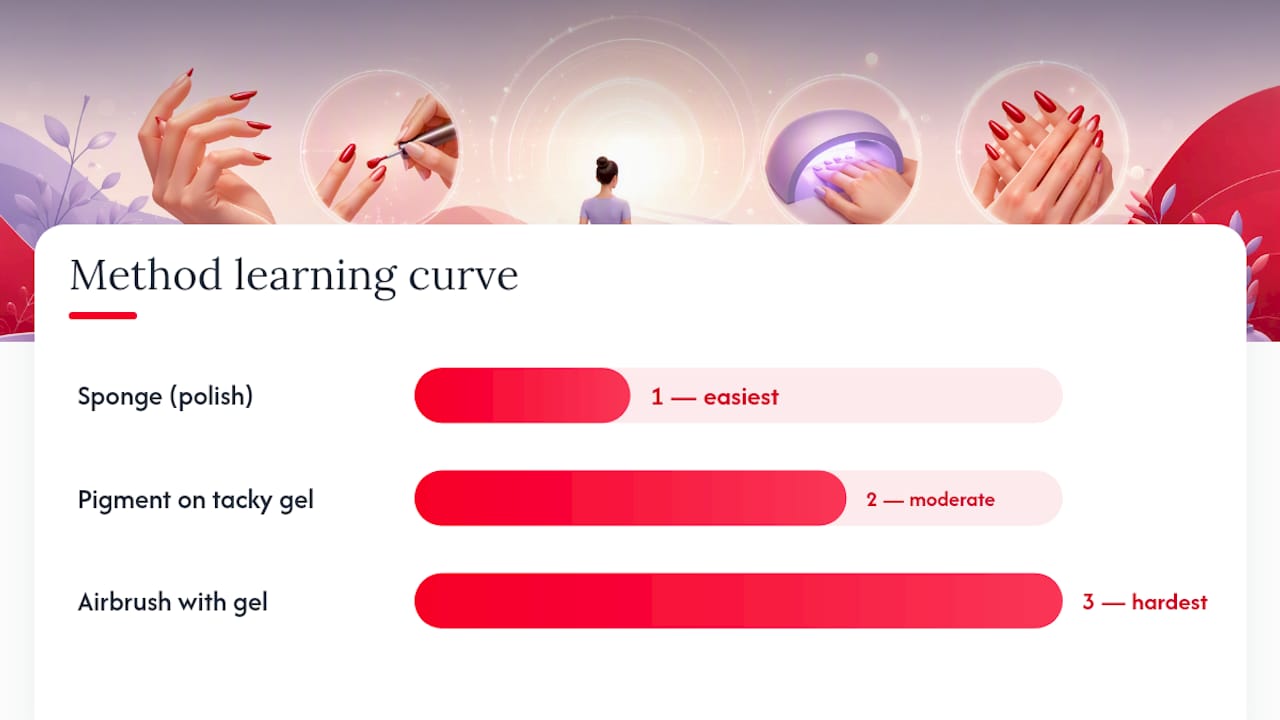
1. The sponge method (easiest for beginners)
Grab a base coat, two polish colors, a top coat, and a makeup sponge cut or torn into small triangular pieces. This method works with regular lacquer, which makes it the most accessible starting point.
Apply a base coat and let it fully dry.
Paint two thin coats of your base nail color and let dry completely.
Dab your accent color onto the sponge, then press it lightly onto the center of the nail.
Tap outward in short strokes, lightening pressure as you move toward the edges to fade the color.
Seal with a glossy or matte top coat once fully dry.
The most common mistake here is loading too much polish onto the sponge. That’s what causes a solid blob instead of a soft glow. Dab off excess on a paper towel before touching the nail, and always work in thin layers.
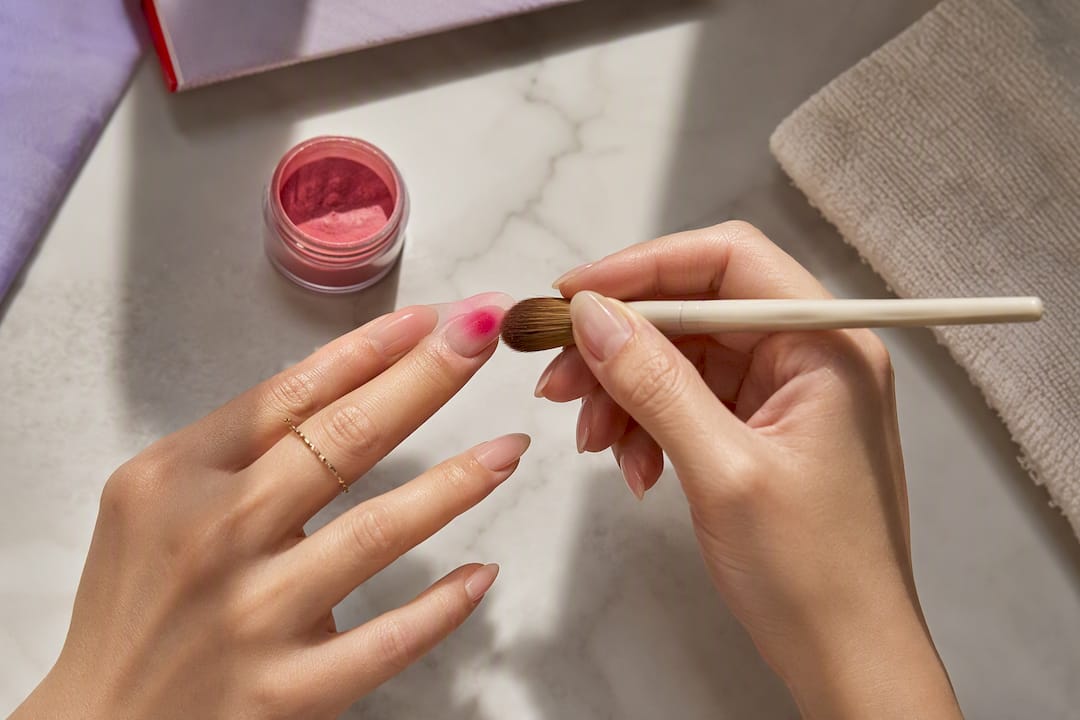
2. Eyeshadow or pressed-pigment on tacky gel
This is the method most manicurists reach for because it gives more control than a sponge. Apply a gel base color and cure it, but stop while it’s still slightly tacky, or apply a thin layer of clear tacky gel over cured polish. Load a dense, fluffy brush with matte eyeshadow or pressed nail pigment, tap off the excess, then press the color into the center of the nail and blend outward with light circular motions. Cure as normal, then seal with top coat. Because the tacky gel grabs the pigment, this technique works well for both gel and lacquer users who want more precise placement than a sponge allows.
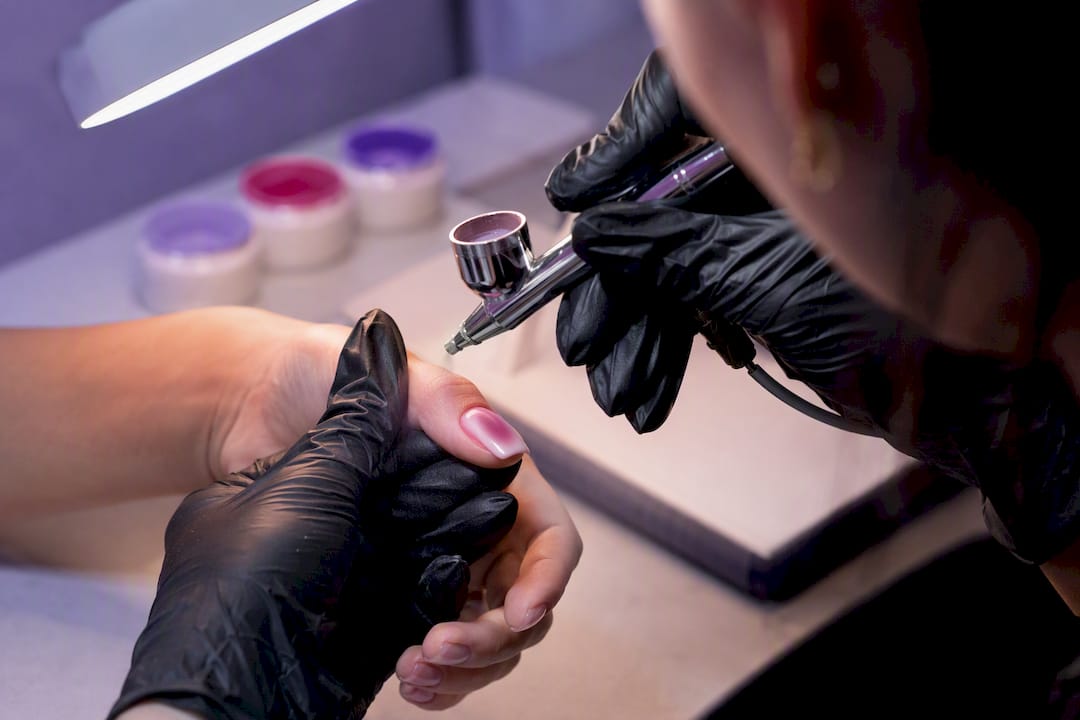
3. Airbrush and gel (the salon route)
Professionals use an airbrush gun loaded with diluted gel pigment to mist ultra-thin layers of color, building the halo gradually with total control over opacity. This is why salon aura nails look cleaner than most DIY attempts: there’s no sponge texture, no visible edge, just a smooth gradient. Book a professional when you want a multi-color Northern Lights set, a crystalline or refracting finish, or symmetrical results across all ten nails.
Whatever method you choose, keep a clean detail brush and a bit of polish remover nearby to tidy up smudges around the cuticle and edges as you go.
Pro Tip: Always let each layer dry or cure fully before adding the next. Aura nails go muddy fast when wet colors touch, so patience matters more than product.
Aura Nail Color Combinations Worth Copying
The best palettes usually fall into one of four categories: soft pastels, jewel tones, neutral glow, or multi-color Northern Lights sets. Pastels like lavender fading into baby blue read soft and everyday. Jewel tones such as emerald into sapphire or magenta into violet feel dressier and photograph well for events. Neutral-glow combos, think champagne fading into soft taupe, work for anyone who wants the trend without loud color. Multi-color sets stack two or three shades into one halo for a bolder statement.
Try these twelve pairings as a starting point:
Lavender into sky blue (soft pastel classic)
Peach into coral (warm and wearable)
Emerald into sapphire (jewel-tone contrast)
Magenta into violet (bold and saturated)
Champagne into taupe (neutral-glow, office-friendly)
Baby pink into white (barely-there aura)
Turquoise into cobalt (beachy contrast)
Mint into seafoam (tonal, low-contrast)
Fuchsia, orange, and yellow (Northern Lights sunset)
Purple, teal, and pink (Northern Lights classic)
Silver into holographic white (chrome-inspired)
Burgundy into dusty rose (fall-leaning tonal)
Contrast palettes (jewel tones, bold multi-color sets) show up better on shorter, rounder shapes where the eye reads the whole nail at once. Tonal, low-contrast combos suit almond and coffin shapes since the elongated canvas gives the gradient more room to breathe, a point worth considering when choosing nail shapes for nail art. Beyond straight color pairing, try a skittle set with a different aura color on each finger, a thin outline traced around the glow for definition, tiny botanical linework layered over the fade, or an opalescent topcoat for extra shimmer.
Fixing Muddy Colors and Uneven Halos
Muddy aura nails almost always come down to two things: sheer polish or a wet layer disturbed too soon. Opaque, saturated colors hold their edge far better than sheer or shimmer polish, which tends to blend into a gray smear the moment a second color touches it. Building color in thin, patient layers, letting each one dry before adding more, fixes most of this on its own.
Tool choice also matters more than people expect. A sponge gives you texture and a slightly imperfect edge, which is part of the charm for a casual look. An airbrush gives a technician pixel-level control over opacity, which is why pros reach for it on multi-color blends where three shades need to sit cleanly next to each other without merging into mud.
If you end up with an uneven halo or a smudged edge, don’t start over. Dip a small detail brush in polish remover and clean up the border, then touch up the thin spot with a tiny dab of color once the surrounding area is dry.
Pro Tip: When in doubt, use one shade less than you planned. A simpler two-color aura almost always looks cleaner than a three-color blend gone slightly muddy.
How Long Aura Nails Last and How to Keep Them Looking Fresh
Wear time depends entirely on what’s underneath the design. A professional gel aura manicure typically lasts two to three weeks with normal daily activity, while an at-home version done in regular lacquer usually holds up for five to seven days before chipping starts at the tips.
A few habits stretch that wear time in either format:
Use a quality top coat and reapply a thin layer every few days if you’re wearing regular polish.
Massage cuticle oil into the nail bed nightly to keep the surrounding skin from drying out and lifting the polish edge.
Skip long soaks in hot water for the first 24 hours, since prolonged moisture is one of the fastest ways to loosen a fresh manicure.
Go easy on activities that put direct pressure on your nail tips right after your appointment.
If your gel aura is chipping only at the tips after two weeks, a salon refill is usually enough. Once you see lifting near the cuticle or cracking across multiple nails, it’s time for a full redo rather than a patch job.
When We Recommend DIY vs. Booking a Professional Aura Manicure
At TJ Nails, we see aura requests every week, and our take is simple: a sponge or eyeshadow aura is a fun weekend project worth trying. But for multi-color Northern Lights sets, crystalline finishes, or a gel and SNS base that actually lasts, book a technician with airbrush experience. The tool makes the difference, not the effort you put in.
— MinhHieu
Ready for a Salon-Grade Aura Manicure? Here’s How to Book
If your DIY sponge attempt came out a little uneven, that’s normal, and it’s exactly the gap a professional airbrush closes. TJ Nails offers gel and airbrush aura designs, SNS dip for a more durable base, and nail art add ons like linework or opal topcoats for anyone chasing the Northern Lights look without the trial and error.
Before your appointment, pull together a few reference photos of the color combo you want, note your preferred nail length and shape, and let your technician know if you’re set on gel versus a lighter lacquer version. Aura designs typically take a bit longer than a standard color manicure since the gradient work is done by hand or airbrush, so plan for a slightly longer chair time. If you’re picking your own polish for touch-ups between visits, opaque, richly pigmented shades hold their color better than sheer formulas. Ready to see it in person? Book your aura nail appointment at our West Bradenton location and bring your inspiration photos with you.
Sources
Trend direction for this guide draws on coverage from IPSY and Elle for technique detail, and Cosmopolitan for 2026 trend forecasting. For tipping guidance on detailed nail art, RealSimple’s etiquette breakdown is a solid reference before your next appointment.
Recommended
Comments