
Gradient Nail Design: What It Is and How to Do It
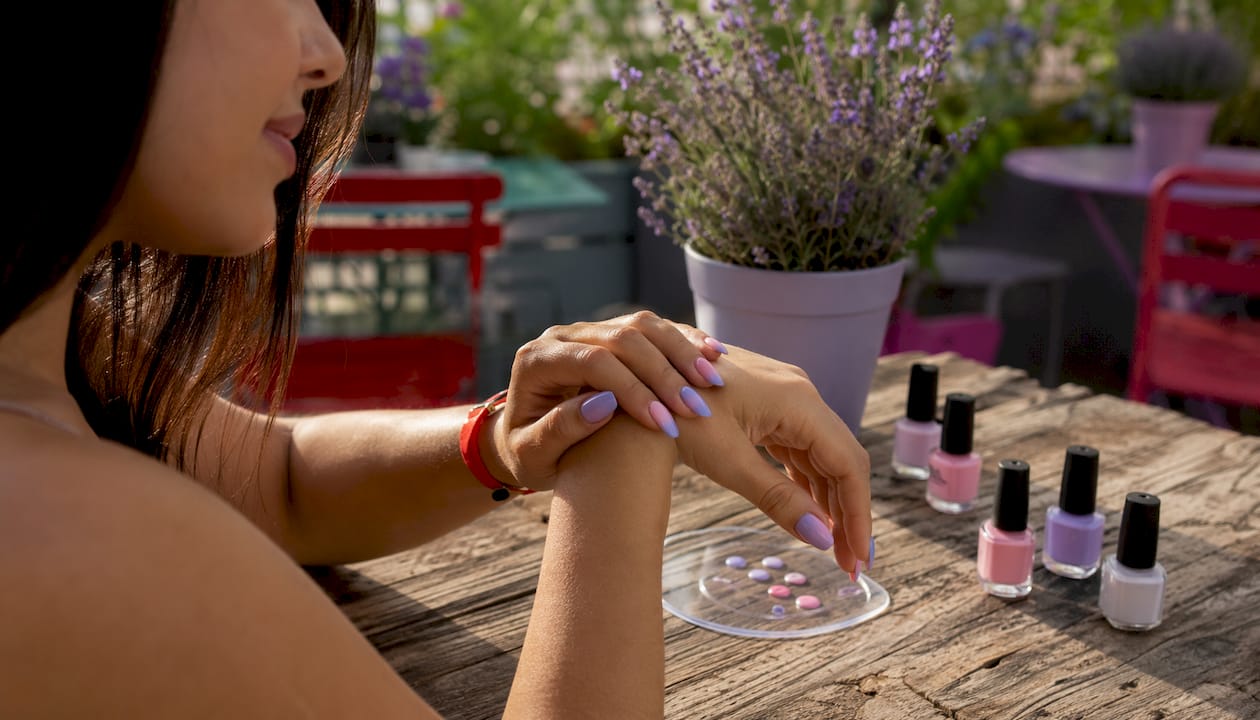
Gradient nail design is a technique that blends two or more polish colors directly on the nail, creating a smooth, seamless color transition with no hard line between shades. The terms “gradient” and “ombre” get used interchangeably in most salons, but there is a technical distinction worth knowing: ombre vs. gradient technically separates a fade within one color family (ombre) from a multi-color blend on a single nail (gradient). In practice, your technician at Bradentonnails will focus on the visual effect you want, not the label. A nail art sponge is the most common tool for both, and brands like Manucurist have made the technique accessible to home users and salon clients alike.
Table of Contents
How do you create a basic gradient nail design?
The sponge method is the go-to starting point for anyone learning how to create gradient nails. It requires minimal tools and produces a convincingly blended finish on the first try, even without prior experience.
What you need:
Two or three nail polishes (creme finish, highly pigmented)
A makeup sponge (cosmetic wedge sponge works best)
Base coat and fast-dry top coat
Liquid latex or tape for cleanup
Nail polish remover and a small brush for edge cleanup
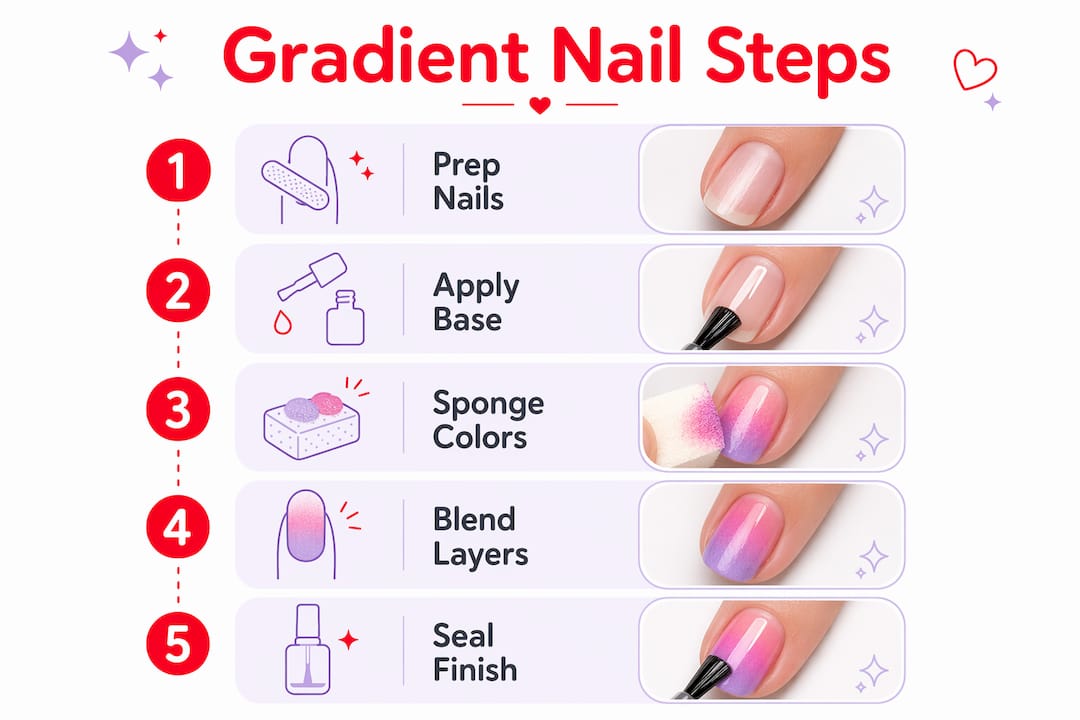
Steps for one hand The process typically takes between a half hour to under an hour, including cleanup.
Apply a base coat to all nails and let it dry completely.
Paint a light or white base color over the entire nail. This step makes your chosen colors pop rather than look sheer.
Paint two (or three) stripes of color side by side on the sponge, overlapping them slightly in the middle.
Blot the sponge once on a paper towel to remove excess polish.
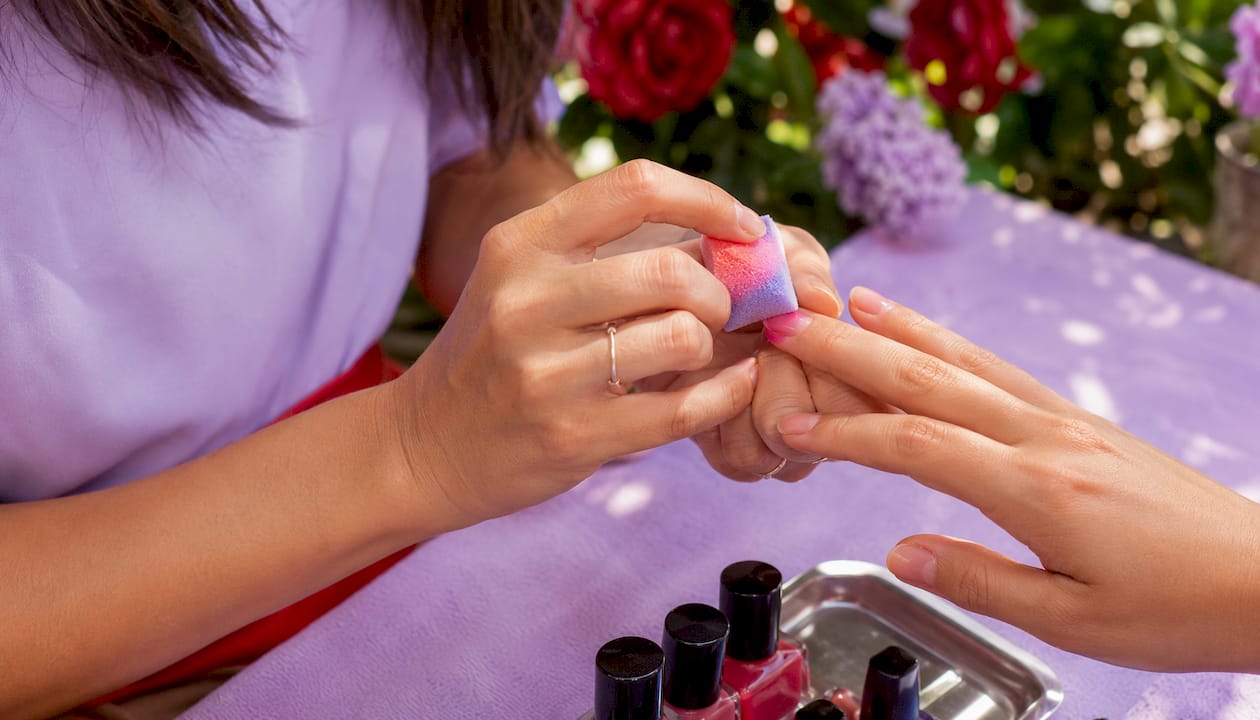
Dab the sponge onto the nail using a rolling, light-pressure motion. Do not rub.
Repeat steps 3–5, building thin layers until you reach the opacity and blend you want. Three to four passes is typical.
Let each layer dry briefly before the next pass to avoid muddiness.
Clean up the edges with a small brush dipped in remover, or peel away the liquid latex barrier.
Seal with a high-shine top coat.
The whole process for one hand runs about 25–40 minutes if you work efficiently. Add another 10–15 minutes if you are doing cleanup without a liquid latex barrier.
What tools and products do you actually need?
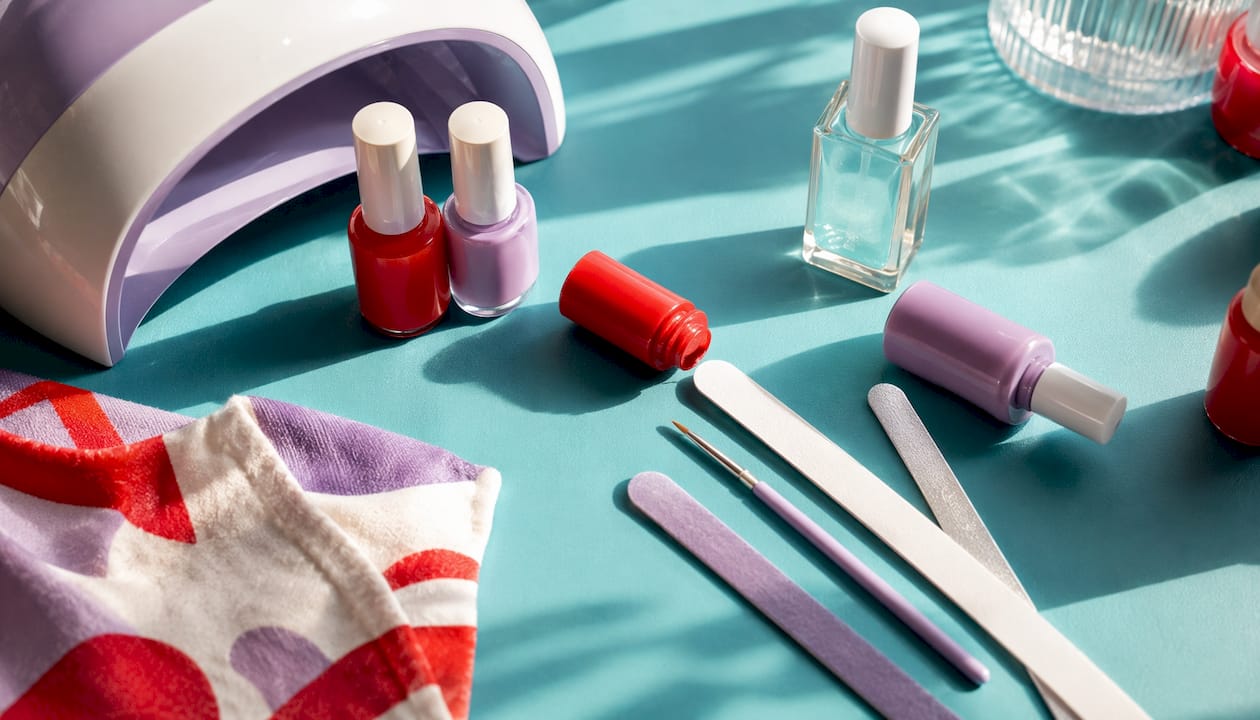
Getting the right products matters more than technique for a first attempt. The wrong polish formula can make blending nearly impossible, no matter how careful you are.
Polish type is the biggest variable. Highly pigmented creme polishes blend most smoothly on a sponge. Sheer or jelly formulas can work as a base layer, but they require more passes to build opacity. Glitter polishes and chunky holographic flakes are harder to blend with a sponge and often need a specialist gradient brush or careful layering instead.
Product | Opacity | Dry Time | Durability | Cleanup Difficulty |
Creme polish | High | Medium | 3–5 days | Easy |
Gel polish | High | Instant (UV cure) | 2–3 weeks | Requires soak-off |
SNS/Dip powder | High | Instant | 3–4 weeks | Salon removal recommended |
Sheer/Jelly polish | Low | Fast | 2–4 days | Easy |
Gel polish produces a longer-lasting gradient and a mirror-like finish, but it requires a UV or LED lamp to cure each layer; for more details, check out the best gel nails in Reno. Regular creme polish is more forgiving for beginners because you can remove and restart without a soak-off process. SNS dip powder gradients are typically done in a salon because the layering sequence is more technical.
Pro Tip: Apply liquid latex or a peel-away barrier around your cuticles before you start sponging. It takes 30 seconds to apply and saves you 10 minutes of edge cleanup afterward. This is one of the most effective cleanup shortcuts used in professional salons.
Which gradient technique should you try?
There are several ways to achieve a gradient effect, and the right choice depends on your skill level, the finish you want, and how much time you have.
Main techniques at a glance:
Sponge method: Paint colors on a sponge, dab onto the nail. Best for beginners; slightly textured surface smooths out under top coat.
Brush/drag blending: Use a thin fan brush to drag and blend colors while wet. More control, higher skill floor.
Airbrush: A spray machine applies a fine mist of color for a flawlessly smooth finish. Salon-only in most cases.
Reverse/vertical/diagonal gradients: The same sponge or brush method, just repositioned. Style variations include horizontal fades, vertical tip-to-base fades, and diagonal blends across the nail.
Glitter gradients: Glitter polish or loose glitter pressed into the wet top coat near the tip, fading toward the base. No sponge needed; easier than it looks.
Technique | Difficulty | Speed | Mess Factor | Finish Quality | Best Polish Match |
Sponge | Beginner | Medium | High | Soft, diffused | Creme polish |
Brush/drag | Intermediate | Slow | Low | Precise, clean | Creme or gel |
Airbrush | Advanced | Fast | Low | Mirror-smooth | Airbrush formula |
Glitter gradient | Beginner | Fast | Low | Sparkly, dimensional | Glitter or flake |
Reverse/diagonal | Beginner–Int. | Medium | Medium | Varied | Creme polish |
Video tutorial tip: The sponge method benefits most from watching a short how-to clip before your first attempt. Seeing the rolling dab motion and the correct sponge pressure makes a bigger difference than any written description. Search “sponge gradient nails tutorial” on YouTube for a quick visual reference. For freehand blending techniques, a video is practically required.
What color combinations work best for gradient nails?
Gradient styles range from barely-there neutrals to vivid statement looks, and the palette you choose sets the entire mood of the manicure. Here are the main style categories with ready-to-use combinations.
Style labels and what they mean:
Quiet luxury: Nude-to-white or taupe-to-cream fades. Understated, polished, works for any occasion.
Sunset: Orange into coral into pink into soft purple. One of the most requested styles and consistently on-trend.
Skittles/rainbow: Each nail is a different color in a gradient sequence across the set. Bold, playful, no blending on individual nails required.
Aura/halo: A radial gradient that radiates from the center of the nail outward, often in soft lavender or pink tones.
Baby boomer: A classic pink-to-white fade from base to tip, similar to a soft French tip with a blended edge.
Palette ideas by style:
Quiet luxury: Pale beige + soft white / Greige + warm ivory / Dusty rose + blush
Sunset: Burnt orange + coral + hot pink / Tangerine + magenta + soft purple
Skittles: Coral, yellow, mint, lavender, and sky blue across five nails
Aura/halo: Soft lilac + white center glow / Dusty pink + nude center
Baby boomer: Sheer pink base + opaque white tip blend
For finish, gloss top coat intensifies color depth, matte top coat softens the blend for a modern editorial look, and chrome powder pressed over the gradient adds a mirror effect. Search “aura nails” or “sunset ombre nails” on Pinterest to pull up reference images you can show directly to your technician. For more color pairing ideas that translate well to gradient work, there are tested combinations worth browsing before your appointment.
What goes wrong with gradient nails and how do you fix it?
Most gradient problems come down to two things: impatience and incompatible products. Here is what to watch for and how to correct it.
Common issues and fixes:
Muddy blend: Colors mixed too aggressively or too many wet layers stacked. Fix: let each layer dry slightly before the next pass, and use fewer colors (two is easier than three).
Patchy, uneven coverage: Not enough passes with the sponge, or polish dried on the sponge mid-application. Fix: reload the sponge and add another thin layer. A sheer shimmer polish over the top can also smooth out patchiness.
Hard line between colors: Colors placed too far apart on the sponge with no overlap. Fix: repaint the sponge with colors overlapping by about a quarter inch.
Staining around the cuticle: Skipping the liquid latex barrier. Fix: use a small brush dipped in remover immediately after each layer, before the polish sets.
Chipping within a day or two: Skipping base coat, or applying top coat too thick in one pass. Fix: thin top coat layers, and reapply top coat every two days to extend wear.
Pro Tip: Avoid over-blending. Once you have a smooth transition, stop. Too many passes with a sticky sponge creates a textured, muddy surface that no amount of top coat will fully fix. Two or three deliberate passes beat ten frantic ones.
When the blend is genuinely beyond saving, remove everything and restart. Trying to correct a muddy gradient by adding more color almost always makes it worse.
Should you DIY or book a salon for gradient nails?
The honest answer depends on three things: how much time you have, what finish you want, and whether the occasion matters.
Time and cost at a glance:
DIY with regular polish generally takes under two hours for both hands, with costs depending on polish and tools.
Salon gradient services with regular polish vary in cost depending on design complexity.
Salon gel gradient services usually cost more and offer longer wear than regular polish options.
Salon SNS/dip gradient services provide the longest wear and professional removal but at a higher price point.
DIY pros and cons:
✅ Lower cost per session once you own the tools
✅ Practice at your own pace, no appointment needed
❌ Cleanup is time-consuming without a barrier product
❌ Finish quality is usually softer and less precise than salon work
❌ Gel and dip gradients are difficult to execute at home without professional equipment
Salon pros and cons:
✅ Professional finish, clean edges, longer wear
✅ Access to gel, dip, chrome, and airbrush options
✅ No cleanup, no tools to buy
❌ Higher per-session cost
❌ Requires booking ahead
Quick decision checklist:
Is this for a special event or photos? Book a salon.
Do you want gel or dip durability? Book a salon.
Are you practicing a new skill or doing a casual look? DIY is fine.
Do you have 90 minutes and the right polish? DIY works.
Want to learn the salon request process before booking? That resource walks through exactly what to ask for.
Pro tips that separate salon results from DIY attempts
The gap between a decent home gradient and a salon-quality one usually comes down to a handful of habits, not talent.
What professionals do differently:
Start with a white or light base coat before sponging. It makes every color appear more vibrant and cuts the number of passes needed.
Use highly pigmented creme polishes, not sheers, for the gradient colors. Sheers require too many layers and tend to look washed out.
Apply thin layers and cure between passes if using gel. Thick gel layers trap air and create uneven texture.
Choose a high-performance top coat, not a drugstore quick-dry formula. A quality top coat smooths the sponge texture and intensifies the finish significantly.
Keep a small cleanup brush loaded with remover at your workstation. Edge cleanup done immediately after each layer is far easier than cleaning dried polish.
For readers in the Bradenton area, Bradentonnails handles gradient requests regularly, including gel gradients, glitter tip fades, and SNS dip options. Mentioning the style you want at booking (sunset blend, baby boomer, aura) helps the technician prep the right colors in advance.
Key Takeaways
Gradient nail design is the most versatile nail art technique available, and the sponge method makes it genuinely accessible to beginners with the right polish and a little patience.
Point | Details |
What gradient nails are | A seamless color blend of two or more shades on a nail, often used interchangeably with “ombre.” |
Best beginner technique | The sponge method: paint colors on a makeup sponge, dab in thin layers, let each pass dry slightly. |
Top pro tip | Apply a white or light base coat first and use liquid latex around the cuticle to cut cleanup time. |
DIY vs. salon rule | DIY works for casual looks; book a salon for gel, dip, special events, or a mirror-quality finish. |
Bradentonnails | Offers professional gradient manicures in Bradenton, FL, including gel, SNS dip, and glitter options. |
Why gradient nails are worth getting right
Most guides treat gradient nails as a novelty technique, something to try once and move on from. That undersells what makes them genuinely useful as a nail art staple.
The real reason gradients have stayed popular since the early 2010s is not the look itself but the flexibility. A quiet nude-to-white fade reads as polished and professional in a work setting. The same technique, swapped to a sunset palette, becomes a statement manicure. No other single technique covers that range without requiring a completely different skill set.
What most beginner tutorials miss is the base color step. Skipping the white or light base is the single most common reason home gradients look dull or require too many passes. The colors simply cannot reach their full saturation on a bare nail, especially with the thin layers the technique demands. That one habit, more than any tool upgrade, is what closes the gap between a decent attempt and a result you actually want to photograph.
The other underrated point: gradient nails are forgiving in a way that freehand nail art is not. A slightly uneven blend reads as intentional. A slightly uneven freehand line does not. For anyone building nail art skills, gradient work is the most rewarding place to start because the margin for error is genuinely wide.
Get a professional gradient manicure at Bradentonnails
Skipping the sponge and the cleanup is a legitimate choice, especially when the occasion calls for a finish that holds up for weeks.

At Bradentonnails in Bradenton, FL, gradient manicures are available in regular polish, gel, and SNS dip powder formats. The service includes nail prep, a light base application, gradient blending by a skilled technician, and a sealed top coat finish. Gel and dip options cure hard, resist chipping, and last two to four weeks without the edge cleanup that makes DIY sessions run long. Add-ons include glitter tip fades, chrome powder, and custom color mixing. When you book, mention the gradient style you want (sunset, baby boomer, aura, or bring a photo) so your technician can have the right colors ready. The salon is open Sundays and accepts online bookings. Book your appointment and tell them the look you have in mind.
Useful sources
Ombre Nail Designs: Gradient Looks That Master the Fade — NailMuse
Gradient Nails: Ideas and Practical Advice — Manucurist
How to Do Gradient Nails — WikiHow
Gradient vs. Ombre: Differences, Examples, and Uses — Obviousmag
What Is the Difference Between Ombre and Gradient Nails — Picture Polish
Ombre Nails: Summer Trend — Grazia Magazine
Ombre Nail Art Style Variations: 2026 Guide — Bradentonnails
Recommended
Comments