
4 DIY Methods for French Ombré Nails and Salon Tips for 3–4 Weeks
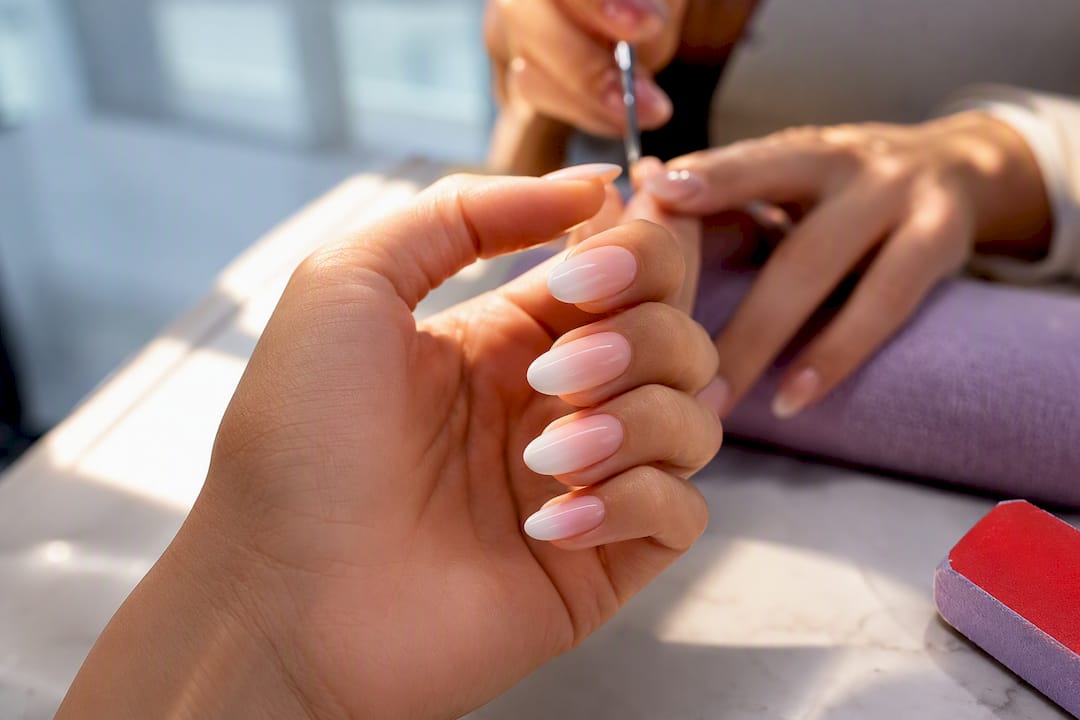
French ombré is a soft color gradient that fades from a nude or pink base into a pale tip with no hard line, softening the classic French manicure into something more forgiving. It flatters almost every skin tone, hides regrowth longer than a crisp French tip, and works for brides, office days, and everything between. This guide covers the styles worth trying in 2026, how to do it yourself, and when it’s worth booking a professional instead.
TL;DR:
French ombré is preferred for its softer, more natural transition, and is increasingly popular for bridal and everyday wear well into 2026.
The style offers numerous variations, including glazed chrome, pastel, and colored tips, allowing customization based on occasion and nail shape.
Achieving a professional-looking ombré at home requires proper prep, layering thin coats, and careful cleanup, but a salon provides superior blending and longer-lasting results.
Gel or dip powder versions last three to four weeks, while regular polish typically needs refreshing within a week or two, with proper maintenance to avoid chipping.
Mistakes like skipping the base coat, using thick sponge passes, or rushing curing undermine DIY results, making professional application the best choice for seamless finish.
Table of Contents
What Is French Ombré and Why Is It Trending in 2026?
French ombré (also called French fade or baby boomer) blends a nude or pink base into a white tip with no defined smile line, so the color transition looks airbrushed rather than painted. That’s the entire difference from a classic French manicure, which relies on a sharp, deliberate edge between the pink base and the white tip. Ombré blurs that edge on purpose.
The trend has real staying power going into 2026, largely because it splits the difference between “done” and “natural.” Allure describes it as a romantic twist on a manicure staple, and it’s become one of the most requested bridal looks for exactly that reason: it photographs well, it doesn’t compete with a dress or jewelry, and it doesn’t scream for attention. Cosmopolitan has tracked its rise through celebrity manicures and editorial shoots, which pushed it well past its original “French fade” nickname into a category of its own.
What’s driving 2026 specifically:
Softer, “quiet luxury” nail looks are replacing high-contrast French tips
Milky and glazed chrome finishes are dominating salon request lists
Bridal clients are asking for ombré by name, not just describing it
Celebrity manicurists have normalized the blended look for everyday wear, not just red carpets
If you want a deeper dive into how modern French styles have evolved, our post on modern French manicure trends breaks down the color pairings gaining traction this year.
What Are the Best French Ombré Nail Design Ideas?
Not every ombré looks the same, and picking the right variation depends on your nails, your event, and how bold you want to go. Byrdie’s roundup of French ombré designs catalogs dozens of takes on the style, but these are the ones worth knowing by name before your next appointment.
Classic milky ombré: sheer pink-white base fading to a barely-there tip. Best on medium almond or oval nails, works for literally any occasion.
Glazed chrome: a milky base topped with pearl chrome powder for a glassy shine. Looks best on shorter square or squoval shapes where the light catches evenly.
Pastel ombré: soft lavender, blush, or baby blue instead of white at the tip. A pretty option for spring and summer, or for brides who want a hint of color.
Glitter accent tip: fine glitter dusted only at the fade point. Great on almond nails for parties or New Year’s Eve.
Colored tip ombré: a bold hue (burgundy, emerald, cobalt) replacing white at the tip. Suits coffin or stiletto shapes for a statement look.
Reverse baby boomer: white starts at the cuticle and fades outward, flipping the usual focal point. Byrdie notes this variant changes finger proportions, which makes it a smart pick on shorter nail beds.
Negative-space French fade: a sheer gap between the base and tip color. Modern and editorial, best on longer square or coffin shapes.
Horizontal ombré: color fades top to bottom instead of tip to base. Unusual and eye-catching on any length.
Two-tone ombré: two distinct colors blending into each other, no white at all. Fun for fall in rust and olive tones.
Metallic French fade: gold or silver foil fading into a nude base. A dressed-up option for weddings or holidays.
For bridal appointments, milky or pastel ombré reads timeless in photos. For everyday wear, classic milky or glazed chrome holds up best without looking like you’re trying too hard.
How Do You Do French Ombré Nails at Home?
Getting a clean gradient without a professional airbrush gun is completely doable, and the method you pick depends on the tools you already own.
Before anything else: shape your nails, push back cuticles, buff the surface lightly, and wipe with rubbing alcohol so polish grips properly. Apply a base coat and let it dry fully. Set up on a paper towel. This part gets skipped constantly, and it’s the reason most DIY ombré looks streaky.
Sponge method (easiest for beginners): Paint a strip of white polish and a strip of your base color side by side on a makeup sponge or wedge, overlapping slightly where they meet. Dab the sponge onto the nail in short, even presses, reapplying polish to the sponge between nails. WikiHow’s step-by-step guide recommends two to three light layers for full opacity rather than one thick pass, which prevents the gradient from looking blotchy. Clean up excess polish around the cuticle with a small brush dipped in acetone, or use liquid latex around the nail beforehand for easier cleanup.
Gel brush blending: This is closer to what a technician does in the salon. Apply a thin layer of gel base color, cure it, then use a detail brush to feather a lighter gel shade from the tip downward while the base is still tacky. Cure between every layer. Allure notes that professionals rely on thin layering and curing passes for the smoothest fade, and rushing this step is the single biggest reason DIY gel ombré looks patchy.
Dip powder: Dip the nail in a base shade, then dip only the tip into a lighter powder, blending at the edge with a brush before sealing. Good for durability, harder to control the gradient precisely.
Airbrush: Fastest, most even results, but requires an actual airbrush kit and stencils. Not practical for a one-time manicure.
Finish every method with a glossy or matte topcoat, cured under an LED lamp if you used gel.
Pro Tip: Keep a small detail brush and pure acetone on hand while you work. Fixing a smudge in the first 30 seconds is easy; fixing it after the polish sets means starting that nail over.
Our guide to ombré nail art techniques walks through tool recommendations if you’re building a kit from scratch.
Should You Get French Ombré at a Salon or Do It Yourself?
A salon visit buys you blending precision that’s genuinely hard to replicate with a sponge, plus gel or builder-in-a-bottle (BIAB) formulas that outlast regular polish by weeks. Technicians also layer and cure gel in passes, the same technique Allure’s manicurists describe, which is what produces that seamless, airbrushed fade instead of a visible line.
What a typical French ombré appointment includes:
Shaping and cuticle work
A gel or SNS dip base application
Hand-blended or brush-blended gradient application
Curing between layers (for gel) and a sealed topcoat
Bring reference photos. Vague requests like “something soft” leave too much room for interpretation, while a screenshot tells your technician exactly where you want the fade to sit. Ask how many color layers they typically use and whether they cure between passes. If a salon can’t show you finished ombré work in their portfolio, or the workstation looks unclean, that’s worth walking away from.
How Long Does French Ombré Last, and How Do You Maintain It?
Because there’s no hard smile line to grow out, regrowth is far less noticeable on French ombré than on a classic French tip. Salon gel or BIAB tends to hold the look for three to four weeks depending on how fast your nails grow, while regular polish versions typically need a refresh within seven to ten days.
Apply cuticle oil daily; dry cuticles make polish lift faster at the edges.
Wear gloves for dishes and cleaning products, which are the top cause of early chipping.
Reapply a glossy topcoat every few days on non-gel manicures to keep the shine and seal small imperfections.
If the fade line shifts as your nail grows, a light retouch at the tip usually buys another week or two before you need a full redo.
Chips near the tip can be spot-fixed with a tiny dab of matching polish blended in with a cotton swab dipped in remover, no need to start over on the whole nail.
What Colors, Finishes, and Nail Shapes Work Best for French Ombré?
Skin tone drives color choice more than trend does. Warm undertones tend to look best with peach or golden-nude bases, cool undertones lean better toward blue-pink or lilac bases, and both pair well with a classic white fade. If you want to skip white altogether, pastels or a single bold tip color still read as “ombré” as long as the transition stays soft.
Glossy finish: reads classic and works for any base color.
Matte finish: modern and understated, especially on darker or jewel-toned bases.
Chrome or glazed finish: best on milky or nude bases, where the shine has room to show.
Shimmer: nice for holiday or party looks layered over a pastel tip.
Shape changes how the fade reads. Longer coffin or almond nails give the gradient more surface area to blend gradually, while shorter square or round nails compress the fade into a tighter, subtler band near the tip. Our post on manicure styles for long nails has more on how length changes the finished look.
What Do Nail Technicians Say About Getting French Ombré Right?
Some salons see French ombré requests from brides, first-timers, and regular clients who want something less severe than the classic French tip. Technicians reach for the same fundamentals editorial sources describe: thin gel layers, curing between passes, and brush blending rather than rushing the gradient in one pass.
A few things that separate a polished result from a rushed one:
Building color in two or three thin layers instead of one thick coat
Curing gel fully between each layer so the next application doesn’t drag the color
Using a clean detail brush, not the bottle brush, for the actual blend zone
Matching the topcoat finish (glossy vs matte) to the requested style before the last cure
If you’re weighing salon options against a hair colorist’s take on gradients, this comparison of ombré and balayage from Joel C Ma Hair Studio makes a similar point about blending patience mattering more than the product itself.
What Nail Care Habits Keep Ombré Nails Looking Fresh?
Healthy nails hold color better and chip less, full stop. Dry, brittle nails cause polish to crack at the edges within days, which is often mistaken for a bad manicure when it’s really a hydration problem.
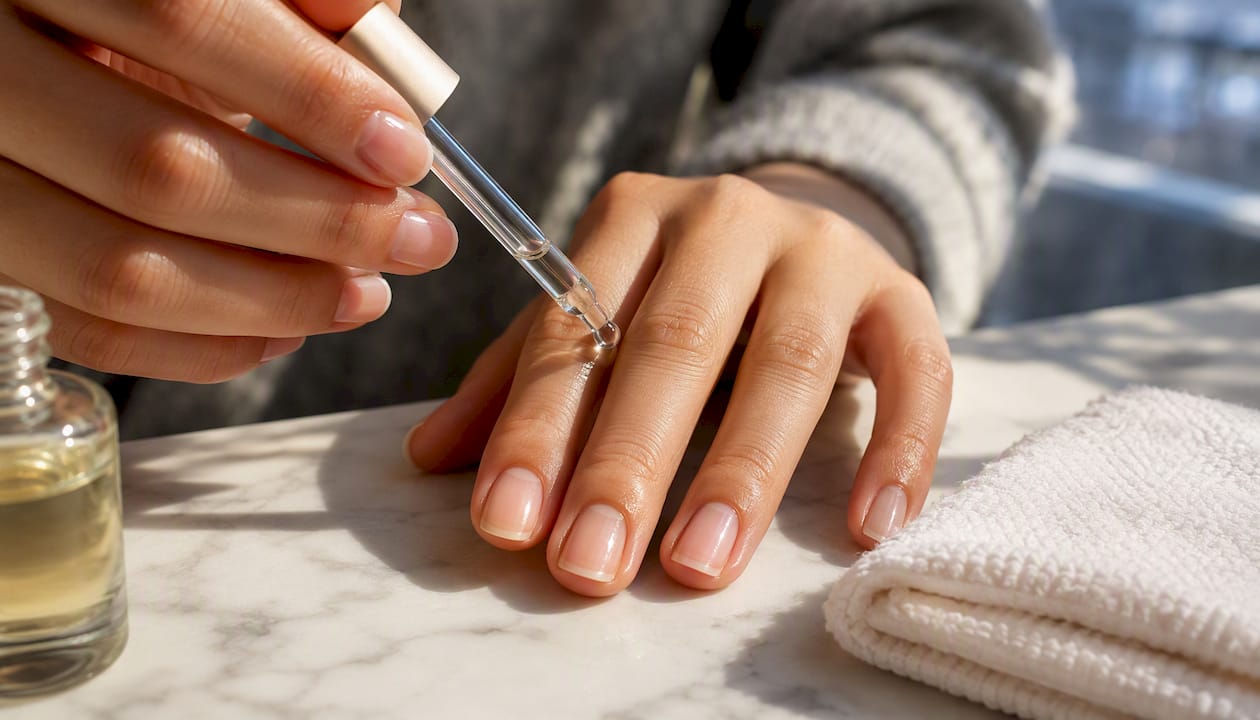
Moisturize the nail plate and cuticle with oil every night, not just when they feel dry. Jojoba or vitamin E based cuticle oils absorb faster than heavier lotions and won’t leave a greasy topcoat feel the next morning. Keep a small bottle at your desk or in your bag; consistency matters more than the product brand.
Avoid using your nails as tools. Opening cans, scratching off labels, or picking at stickers is the single fastest way to chip a fresh ombré fade, especially near the tip where the polish is thinnest. Wear cotton-lined gloves for cleaning and dishwashing, since hot water and detergent strip both natural oils and topcoat sealant.
Rehydrate hands after every hand wash. Nails absorb moisture from the surrounding skin, and constantly dried-out cuticles pull polish away from the nail edge faster than normal wear would.
Skip the acetone-based remover for touch-ups if you can. Pure acetone dries out the nail plate quickly; a gentler soy-based remover works almost as well for spot fixes and won’t leave nails brittle for the next manicure.
Get regular trims and light buffing between color appointments, even if you’re not changing polish. Overgrown or rough edges catch on fabric and hair, which chips tips before anything else does.
Finally, give nails an occasional bare week between gel sets if you’re a regular client. Continuous gel wear without a break can thin the nail plate over time, making future manicures harder to maintain.
What Are the Most Common French Ombré Mistakes?
Most DIY ombré fails come down to rushing one of three steps: prep, layering, or cleanup.
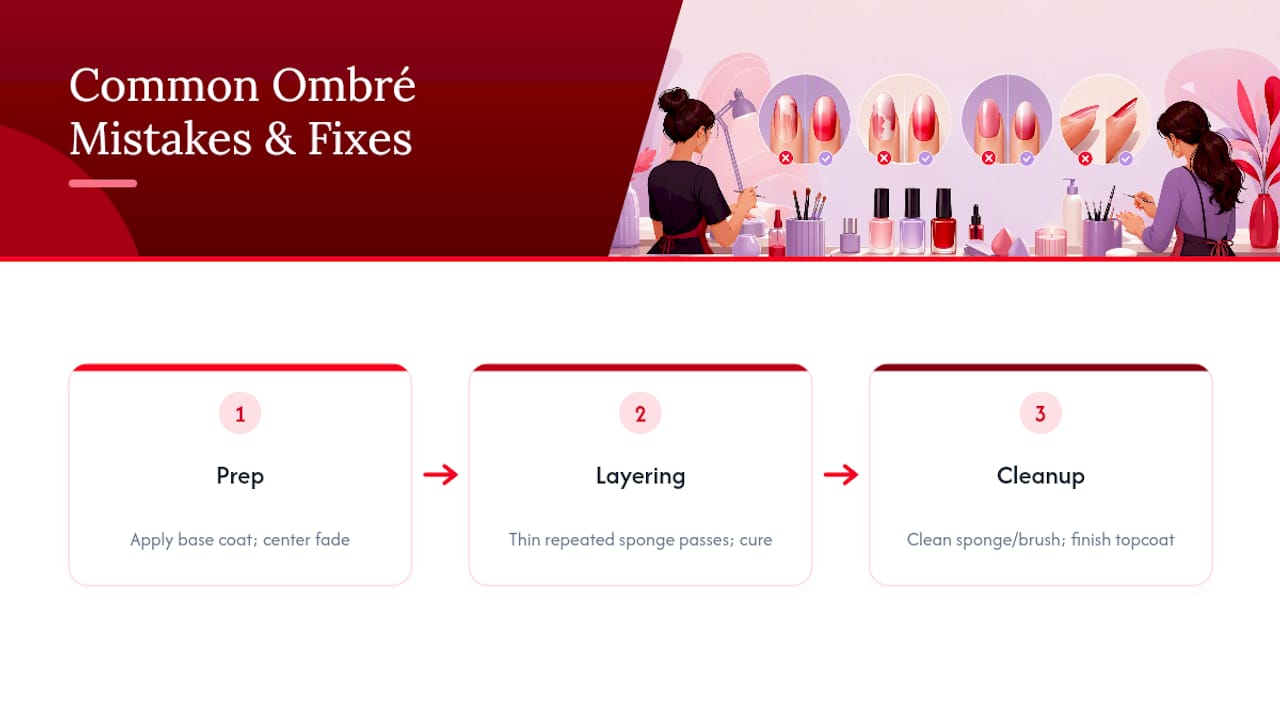
Skipping the base coat. Polish applied directly to bare nail stains the nail bed and peels faster. A base coat isn’t optional, even for a quick at-home try.
Using one thick sponge pass instead of two or three light ones. A single heavy dab creates a muddy, uneven blend with visible sponge texture. Thin, repeated layers build opacity gradually and look far smoother.
Not cleaning the sponge or brush between nails. Reusing a saturated sponge without adding fresh polish makes each nail progressively lighter or streakier than the last.
Rushing gel cure times. Moving to the next layer before the previous one fully cures drags color and ruins the gradient line. If you’re using a gel method, resist the urge to speed through curing.
Placing the fade in the wrong spot. Starting the gradient too close to the cuticle makes nails look shorter and can read as regrowth rather than intentional style. Center the transition in the top third of the nail for the most flattering result.
Choosing too much contrast for a “soft” look. If the goal is the trending milky or low-contrast style, using a stark white against a deep base defeats the purpose. Stick to closer tonal pairings for that airbrushed effect.
Forgetting the topcoat. An unsealed ombré fade unevenly and chips within a day or two. Always finish with a glossy or matte topcoat over the fully cured design.
Ready to Book Your French Ombré Look at TJ Nails?
Skip the sponge cleanup and uneven cure times: a professional nail salon delivers salon-level blending that’s genuinely hard to nail down at your kitchen table, with gel and dip powder options built to outlast a DIY version by weeks, not days.
Our technicians offer French ombré through several service routes depending on what you want. A classic gel manicure gets you the blended fade with standard wear time, while SNS dip powder holds color and shape longer if you want the look to last through several weeks without a touch-up. Bring a reference photo when you book. Milky, chrome, and colored-tip variations all look different in person than they do described out loud, and a screenshot saves back-and-forth chair time.
DIY works fine for a one-off event or a quick trend test. But if you want the seamless, no-visible-line blend that made this trend popular in the first place, that’s a hand-eye skill technicians practice daily. Book a manicure appointment at TJ Nails in Bradenton and ask specifically for the French ombré or French fade technique when you schedule.
A Nail Tech’s Honest Take on the French Ombré Trend
The biggest misconception about French ombré is that it’s a beginner-friendly downgrade from a “real” French manicure. It’s the opposite. A crisp French tip forgives an unsteady hand because the line is supposed to be sharp. Ombré has nowhere to hide, which is exactly why salon blending outperforms most DIY attempts, and why milky or pastel tones are the smartest first try for anyone new to the style.
If you’re booking your first appointment, bring photos, ask for gel if you want it to last, and don’t over-request contrast. Soft wins here.
— MinhHieu
Sources
FAQ
What Is a French Ombré Manicure?
A French ombré manicure blends a nude or pink base into a lighter tip with no hard line, softening the traditional French manicure’s sharp edge into a gradual gradient.
Is French Ombré Classy?
Yes. Its low-contrast, blended finish reads polished without looking flashy, which is why it’s become one of the most requested bridal and workplace nail styles.
Are Ombré Nails Still in Style in 2026?
Ombré nails are trending stronger than ever in 2026, with milky and glazed chrome variations dominating salon requests as part of a broader shift toward softer, quiet luxury nail looks.
What Are the Best Colors for Ombré Nails?
Milky white-to-nude remains the most versatile and popular choice, while pastels and bold colored tips work well for readers who want a more fashion-forward take on the same technique.
How Long Does French Ombré Last?
Salon gel or BIAB versions typically hold the fade for three to four weeks with minimal regrowth showing, while regular polish versions usually need a refresh within seven to ten days.
Recommended
Comments