
Marble Nail Design: Visual Guide, Ideas & How-To
- Bradenton Salon Today
- 5 days ago
- 8 min read
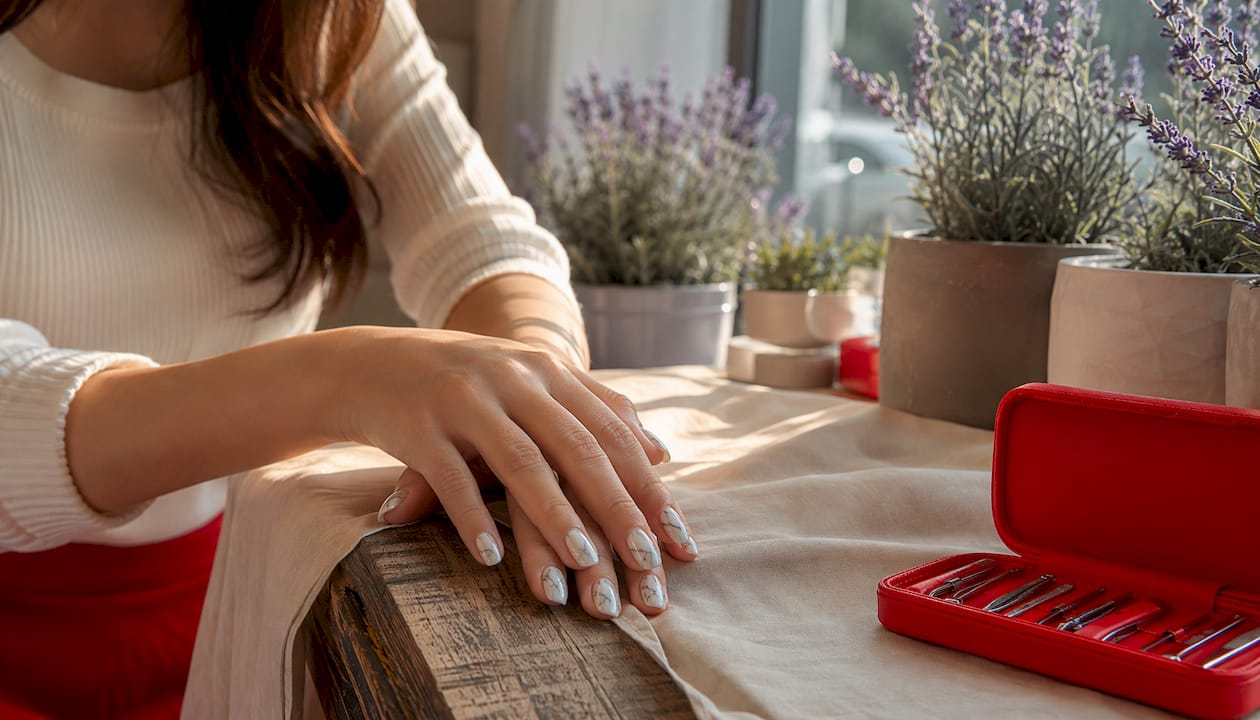
Marble nail design recreates the natural veining of stone — think swirling quartz or Carrara marble — by blending two or more polish colors into soft, flowing lines directly on the nail. The result is a look that reads as sophisticated nail art without requiring a single straight edge. Two methods dominate: water marbling (you dip the nail into floating polish rings on water) and gel dry-swirl (a technician draws and blends gel colors before curing). Visually, the style ranges from soft milky layers that barely whisper “stone” to sharp black-and-white veins that look carved from granite.
Water marbling: Polish is dropped onto room-temperature water, dragged into a pattern, and the nail is dipped through the surface.
Gel dry-swirl: Gel color is placed on the nail in dots or lines and swirled with a fine tool while still uncured, then flash-cured to lock the design.
Marble nails remain one of the most-requested styles for weddings and formal occasions precisely because the look scales from understated to statement without changing the technique.
Table of Contents
What do marble nail designs actually look like?
Marble nail design is not one fixed look. Palette and contrast level change the mood entirely, from everyday polish to full editorial statement. Here are the main style directions and how to recognize them.
Style | Palette | Finish | Mood |
Classic stone marble | White + gray (Carrara/Calacatta) | Glossy or matte | Timeless, bridal |
High-contrast graphic | Black + white | Glossy or chrome | Bold, editorial |
Soft luxury / blush | Blush pink + gold veins | Shimmer or foil accent | Romantic, feminine |
Colorful statement | Cobalt, emerald, or terracotta + white | Glossy | Seasonal, playful |
Milky / nuance | Sheer white + jelly or translucent base | Jelly or translucent | Minimal, modern |
Mixed-medium | Any base + gold leaf or chrome powder | Chrome or matte | Textured, luxe |
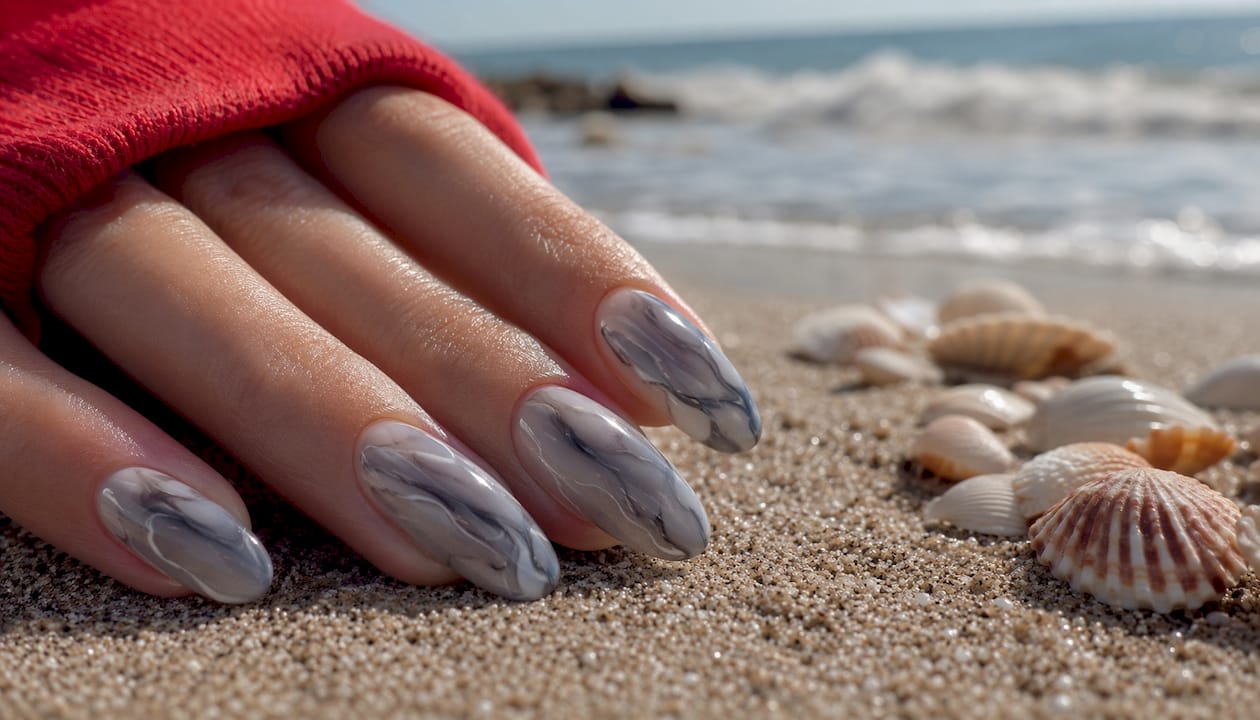
The 2025–2026 trend has shifted noticeably toward the milky “nuance” end of that table. Nail artist Kandalec, quoted by InStyle, describes the direction as “lots of rocks and earthy things like quartz” built from layered sheer and jelly polishes with marble inks. That sheer, layered approach makes marble far more wearable day-to-day than the stark black-and-white version most people picture first.
Nail shape matters more than most people expect. Longer almond or rounded shapes let veins open up and flow, which reads as more organic and stone-like. Shorter squoval nails compress the pattern into a tighter, more graphic look that actually suits professional settings well. For nail art on long nails, the classic Carrara palette is especially striking.
How marble nails are created: the two main methods
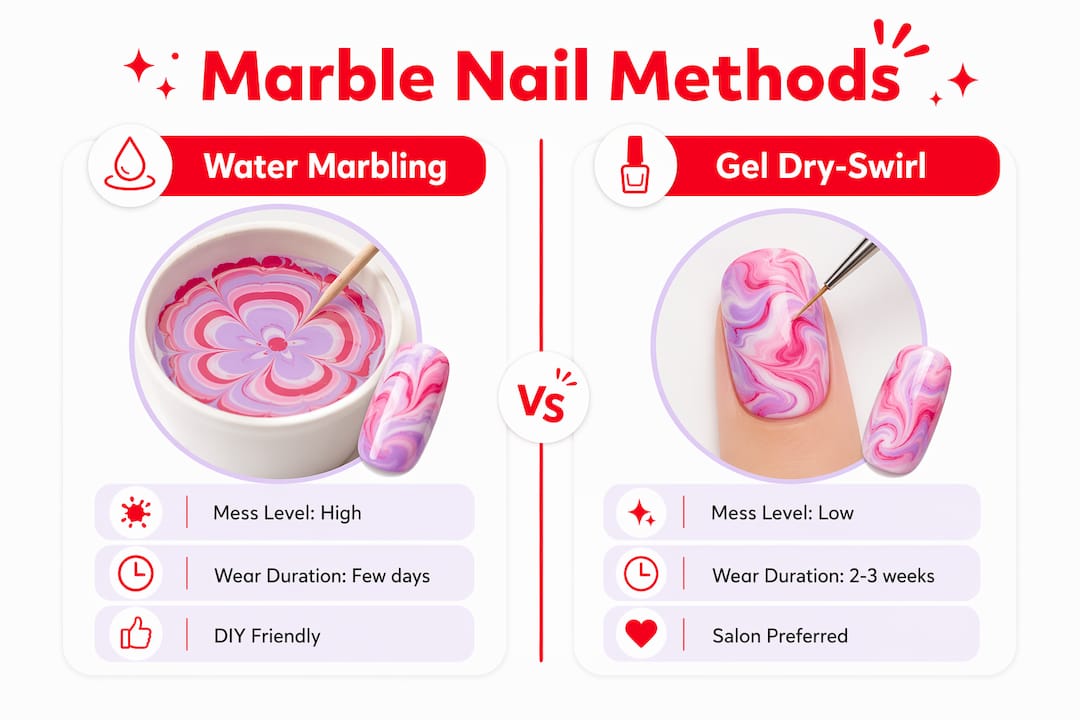
Two professional methods dominate marble nail creation: water marbling and gel dry-swirl. Each produces a different quality of result and suits a different setting.
Water marbling
Fill a small cup with room-temperature water (cold water slows polish spread; warm water speeds it too much).
Drop two or three contrasting polishes onto the surface in concentric rings.
Drag a toothpick or fine stylus through the rings to create veins or feathered patterns.
Tape or apply liquid latex around the finger to protect the skin.
Dip the nail face-down through the surface of the floating design.
Clean the excess polish from the water surface before lifting, then peel the tape and apply a top coat.
Pros: No special equipment needed; highly organic, unpredictable results that look genuinely stone-like. Cons: Messy, difficult to repeat, and regular polish durability means chips within 5–7 days without a gel top coat.
Gel dry-swirl (salon method)
Apply and cure a gel base coat.
Place small dots or thin lines of contrasting gel colors directly on the nail.
Swirl and drag with a fine silicone tool or detail brush while the gel is still uncured.
Flash-cure for 10–15 seconds to partially set the design without locking it fully.
Refine any veins or edges with a clean brush dipped in gel cleanser.
Apply a final gel top coat and cure fully under an LED or UV lamp.
Pros: Higher precision, repeatable results, and gel durability means 2–3 weeks of wear. Salons prefer this method because uncured gel stays workable long enough to refine every vein before it sets. Cons: Requires a lamp and gel products; harder to DIY without practice.
Factor | Water marbling | Gel dry-swirl |
Mess level | High | Low |
Durability | a few days | a few weeks |
Precision | Low (organic) | High |
DIY-friendly | Yes | Moderate |
Equipment needed | Cup, toothpick, tape | Gel kit, LED lamp |
Pro Tip: For water marbling, use nail design techniques with thin, fast-drying polishes and work quickly — most polishes skin over within 60 seconds of hitting the water. For gel swirl, keep your gel drops small and thin; thick blobs resist blending and create muddy edges rather than clean veins.
What tools and products do you need?
For water marbling (DIY)
Item | Purpose |
Base coat + top coat | Protect nail and seal design |
2–3 contrasting polishes | Create the marble pattern |
Room-temperature water in a cup | Floating medium for polish |
Toothpick or fine stylus | Draw veins through floating polish |
Painter’s tape or liquid latex | Protect surrounding skin |
Acetone and cotton swabs | Clean up edges after dipping |
Widely available U.S. brands like OPI, Essie, and Sally Hansen all work for water marbling. Thin, fast-spreading formulas perform better than thick, creamy ones.
For gel dry-swirl (salon or advanced DIY)
Item | Purpose |
Gel base coat | Adhesion layer |
Gel color pots (2–3 shades) | Build the marble pattern |
Fine silicone tool or detail brush | Swirl and drag veins |
LED or UV lamp | Cure each layer |
Lint-free wipes + gel cleanser | Wipe dispersion layer; clean brushes |
Gel top coat | Seal and add finish |
Optional add-ons worth knowing: gold leaf or foil pressed onto uncured gel creates a mixed-medium marble effect; chrome powders rubbed over a matte top coat produce a mirror-like vein; jelly polishes layered over a white base build that sheer, quartz-like depth the nuance trend is built on.
Salon vs. DIY: what to expect and how to decide
A typical salon gel marble appointment follows this sequence:
Nail prep: shape, buff, dehydrate, and apply primer or bond.
Gel base coat applied and cured.
Base color built up in 1–2 thin layers, each cured.
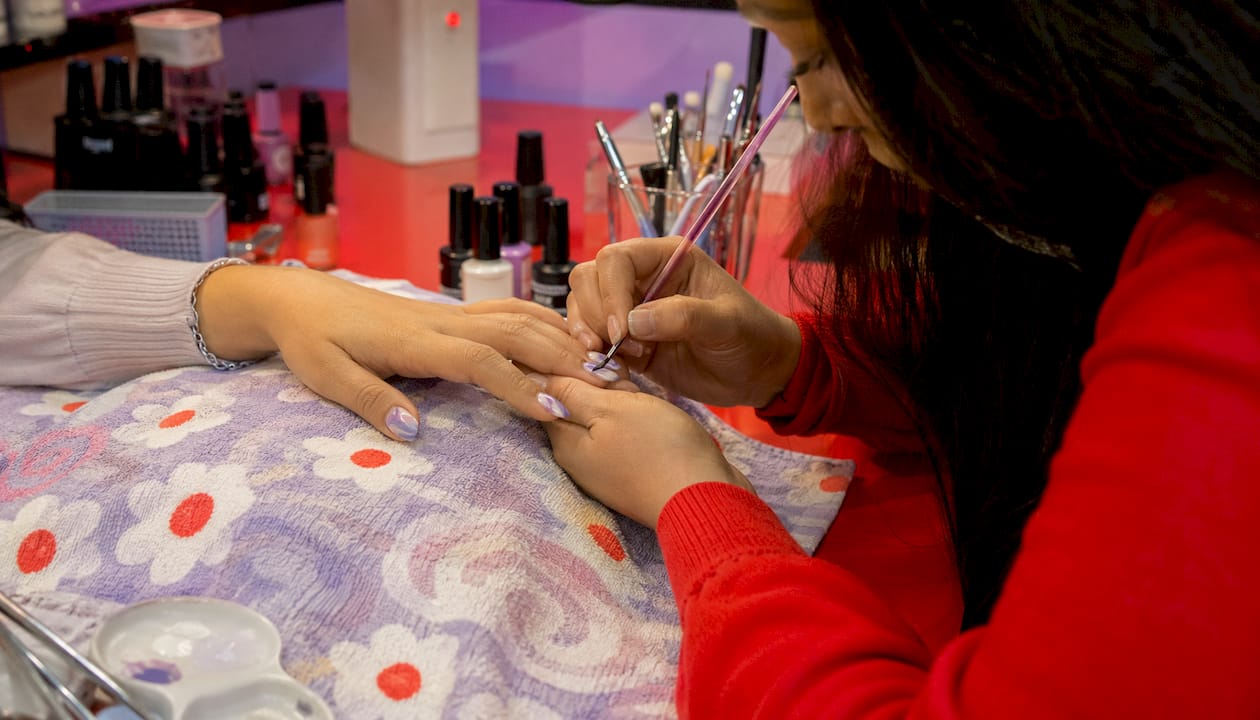
Marble colors placed and swirled while workable.
Flash-cure, refine veins, then full cure.
Top coat applied and cured; cuticle oil finished.
Salon appointments typically run about half an hour to an hour per hand depending on complexity, with U.S. prices commonly ranging from moderate to higher levels. Extensions, embellishments like gold leaf, or longer nail lengths tend to increase the price.
When DIY makes sense:
You want to practice the look before committing to a salon visit.
You’re comfortable with regular polish and a bit of cleanup mess.
The design is for casual wear, not an event.
When to book a pro:
You want gel or acrylic durability (2–3 weeks of wear).
The occasion is a wedding, photoshoot, or formal event.
You want a specific stone aesthetic matched precisely.
Bring a reference photo. Naming a stone aesthetic helps more than describing a color: “Carrara” signals soft gray veining on white; “Calacatta” means bolder, warmer veins; “Nero Marquina” means black with white veins; “smoky quartz” signals a translucent gray-brown. Telling your technician the stone name plus your preferred intensity (soft and nuanced vs. graphic and bold) and finish (glossy, matte, chrome) gives them everything they need to map the design.
How long do marble nails last, and how do you remove them?
Longevity depends on the system used:
Regular polish marble: Often less than a week before chipping, longer with a quality top coat refresh.
Gel marble: Typically lasts multiple weeks with proper prep and aftercare.
Acrylic or dip marble: Usually several weeks, though wear may appear earlier at tips.
To extend wear, apply a thin layer of top coat every 3–4 days, focusing on the free edge. Keep hands out of prolonged soaks (dishes, baths) without gloves, and avoid using nails as tools.
Pro Tip: Never pry or peel gel or dip marble off. Peeling lifts the nail plate and causes thinning that takes months to grow out. For gel, soak a lint-free pad in pure acetone, wrap each nail in foil for 10–15 minutes, then slide the softened product off gently with an orangewood stick. For dip or acrylic, professional removal is the safest route.
For regular polish, a standard acetone soak on a cotton pad held for 30–60 seconds dissolves most marble polish cleanly. The layered nature of the design means it may take slightly longer than a single-color manicure.
Key Takeaways
Marble nail design is one of the most versatile nail art styles available, equally at home as a soft everyday look or a bold statement, depending entirely on palette and contrast.
Point | Details |
What it is | Marble nails mimic stone veining by blending two or more polish colors into swirls or veins. |
Two main methods | Water marbling (DIY-friendly, organic results) and gel dry-swirl (salon-preferred, more durable). |
Best nail shapes | Almond and long rounded shapes let veins flow; squoval and shorter nails create a tighter, modern look. |
Salon time and cost | Expect 30–60 minutes per hand and $30–$70 at most U.S. salons, more for extensions or embellishments. |
Bradentonnails recommendation | Book at Bradentonnails for professional gel or dip marble with skilled technicians in Bradenton, FL. |
Why marble nails reward a little planning
The biggest mistake people make with marble nails is treating the style as one fixed look. It isn’t. The same technique that produces a barely-there quartz shimmer can, with a different palette and contrast level, produce something that reads like a graphic art print. That range is exactly what makes marble so durable as a trend — it doesn’t go out of style because it keeps reinventing itself.
What I find underestimated is the role of finish. Most people focus on color and ignore whether they want glossy, matte, or chrome. A classic Carrara white-and-gray marble under a matte top coat looks completely different from the same design under high-gloss or chrome powder. The finish is often what separates a result that looks like nail polish from one that looks like actual stone. Before you book or buy supplies, decide on the finish first, then work backward to the palette.
The nuance trend toward sheer, layered, quartz-like looks is genuinely worth trying even if you think marble isn’t your style. It’s far more wearable than the stark black-and-white version, and it photographs beautifully without looking overdone.
Get professional marble nails at TJ Nails in Bradenton
Marble nails done well take the right products, the right tools, and a steady hand. At Bradentonnails (TJ Nails), skilled technicians in Bradenton, FL offer professional marble manicures in gel, SNS dip, and acrylic — with the precision and durability that DIY methods rarely match.

Before your appointment, pull a reference photo and note the stone name and finish you want. The team at Bradentonnails can match Carrara softness, Calacatta drama, or a sheer quartz nuance look, and they’ll walk you through options if you’re not sure. Appointments typically run 45–60 minutes for a full marble set. Book your marble manicure online or check out the SNS dip options for a longer-lasting marble finish — no guesswork, just great nails.
Useful sources and further reading
Marble Nail Designs: 25 Looks From Carrara White to Black Veined | NailMuse — Trend piece with style gallery and palette ideas.
What Are Marble Nails | Nailicy — Definition, technique overview, and client-communication tips.
Do Nail Salons Do Marble Nails? | Nailicy — Salon workflow, cost ranges, and method comparison.
Water Marble Nail Technique | Wikipedia — Technical overview of the water marbling method.
6 Nail Trends Everywhere in 2026 | InStyle — Trend piece covering nuance nails and the quartz-inspired aesthetic.
Marble Nails DIY | Real Simple — Practical DIY guide with shape recommendations.
Behind the Scenes: Matte Marble Nail Art | Nails Magazine — Step-by-step salon tutorial from a professional nail artist.
Marble Nail Art Designs 2026 | Outfit Ideas Daily — Inspiration gallery with color and finish suggestions.
Recommended
Comments